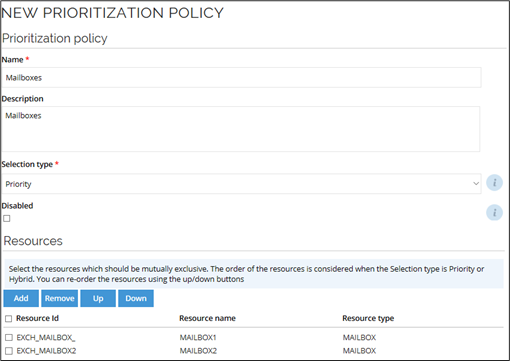
Create prioritization policy
-
As a user with administrative access, go to Setup > Master Data > Policies... > Prioritization Policies, then click New in the top left-hand corner.
- On the page for the New Prioritization policy, type in the name and the description of the policy in the appropriate fields. Only the Name setting is mandatory. However, if you have many Prioritization policies in your system, it may be a good idea to also fill in the description.
-
Choose if the policy should be disabled. If the Disabled checkbox is selected, the policy will be ignored when RoPE calculates identities.
- If a resource is part of more than one prioritization policy, only one of those policies can be enabled at a time, all the remaining policies must be disabled.
-
Choose the selection type: Priority, Most specific assignment, or Hybrid.
-
Add all the resources that you want to be mutually exclusive and arrange them in the right order. The order of the resources is taken into consideration when the Selection type is Priority or Hybrid. You can reorder the resources using the Up/Down buttons.
-
Click OK on the New prioritization policy page to save your new policy and close this page.
Manage prioritization policies
To manage the already defined prioritization policies, go to Setup > Master Data > Policies > Prioritization policies.

Click the ellipsis (...) and select the UI action Assignments affected by this policy to display the assignments that are in scope for this policy.