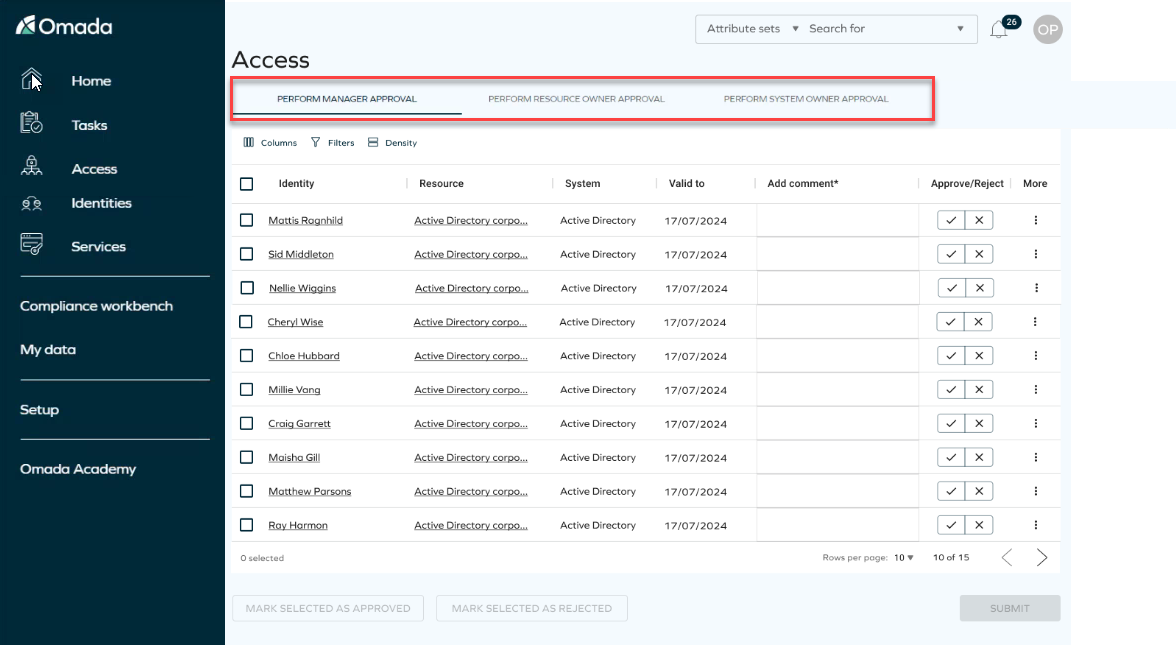
Access approval
The Access Approval link in the navigation pane allows you to view all the questions assigned to you. At the top, you will find different tabs based on your permissions and workflow steps. To view questions in each step, simply click on the corresponding tabs.
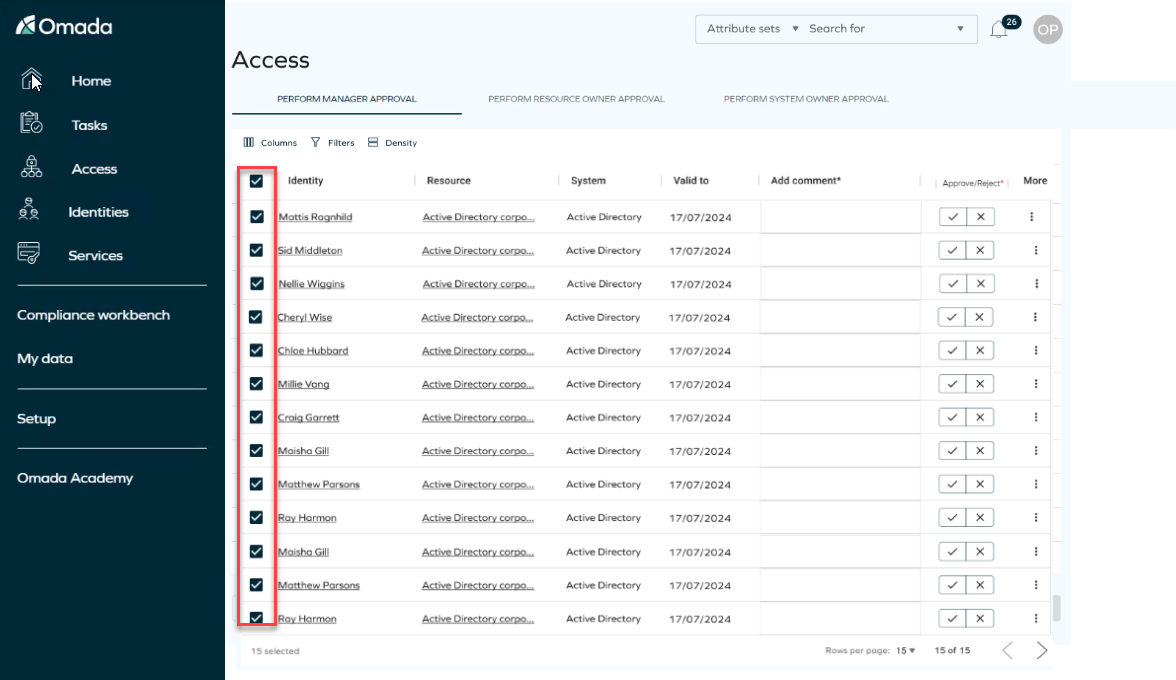
You can answer questions in bulk by selecting them all, choosing your answers, and then clicking Submit. It's crucial to submit your answers before closing the tab, as there is no option to save your changes for later retrieval.
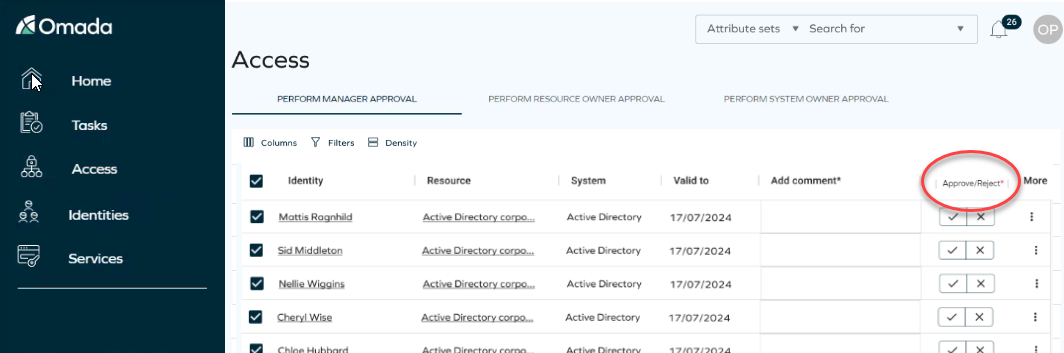
If there is a mandatory column, a red indicator will appear, indicating that you need to complete it. You must fill out these fields in order to enable the submit button.
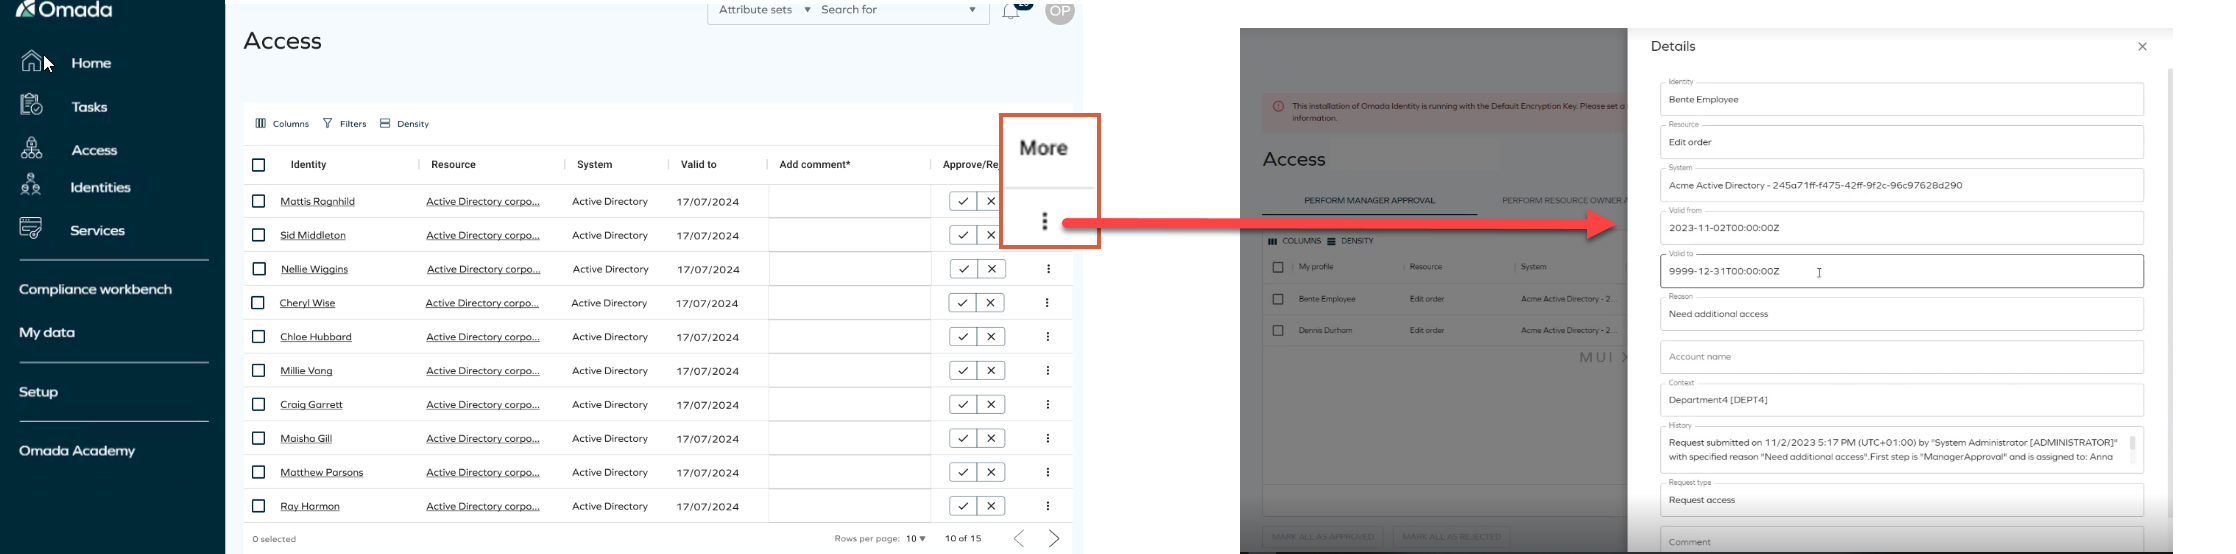
Clicking on the three dots More allows you to access additional information about the form. However, please note that editing is not possible.
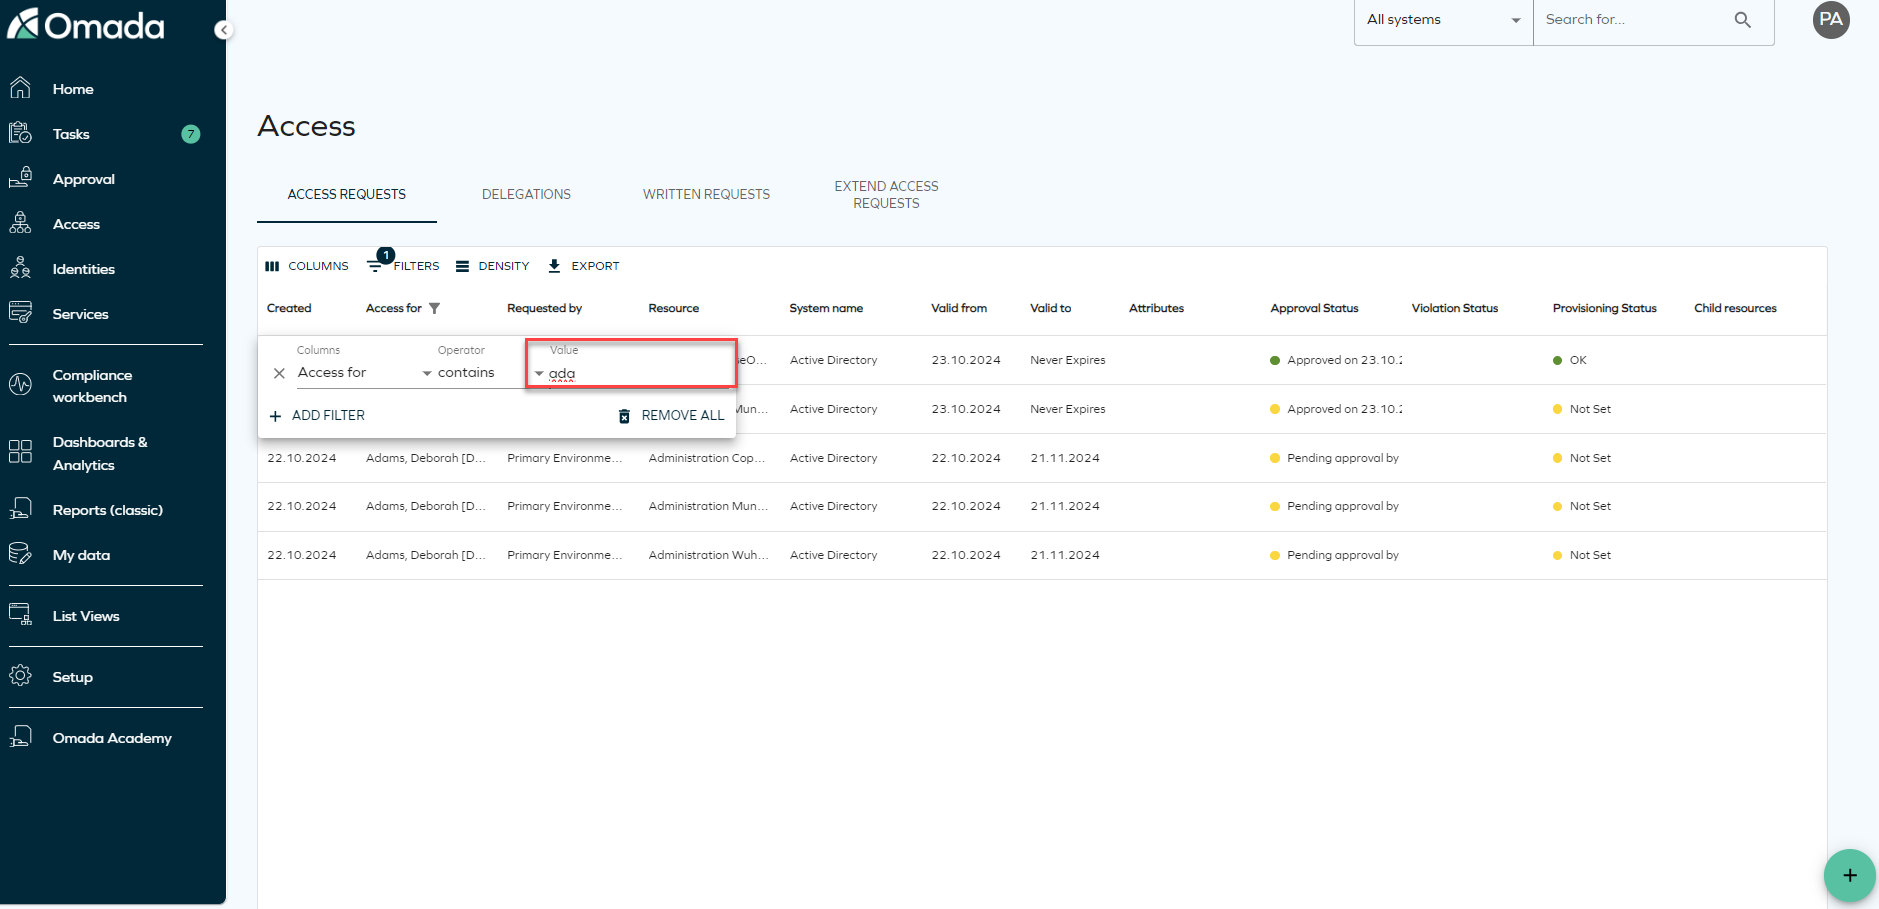
You can use the columns and filters to customize how the page appears. Keep in mind that these changes will only be visible to you.
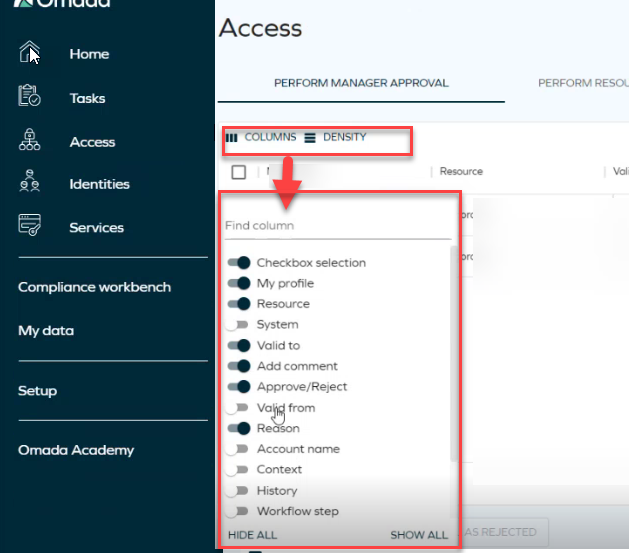
When using the filters, please take into account that the search filter operates by matching the first letters of the word you are searching.
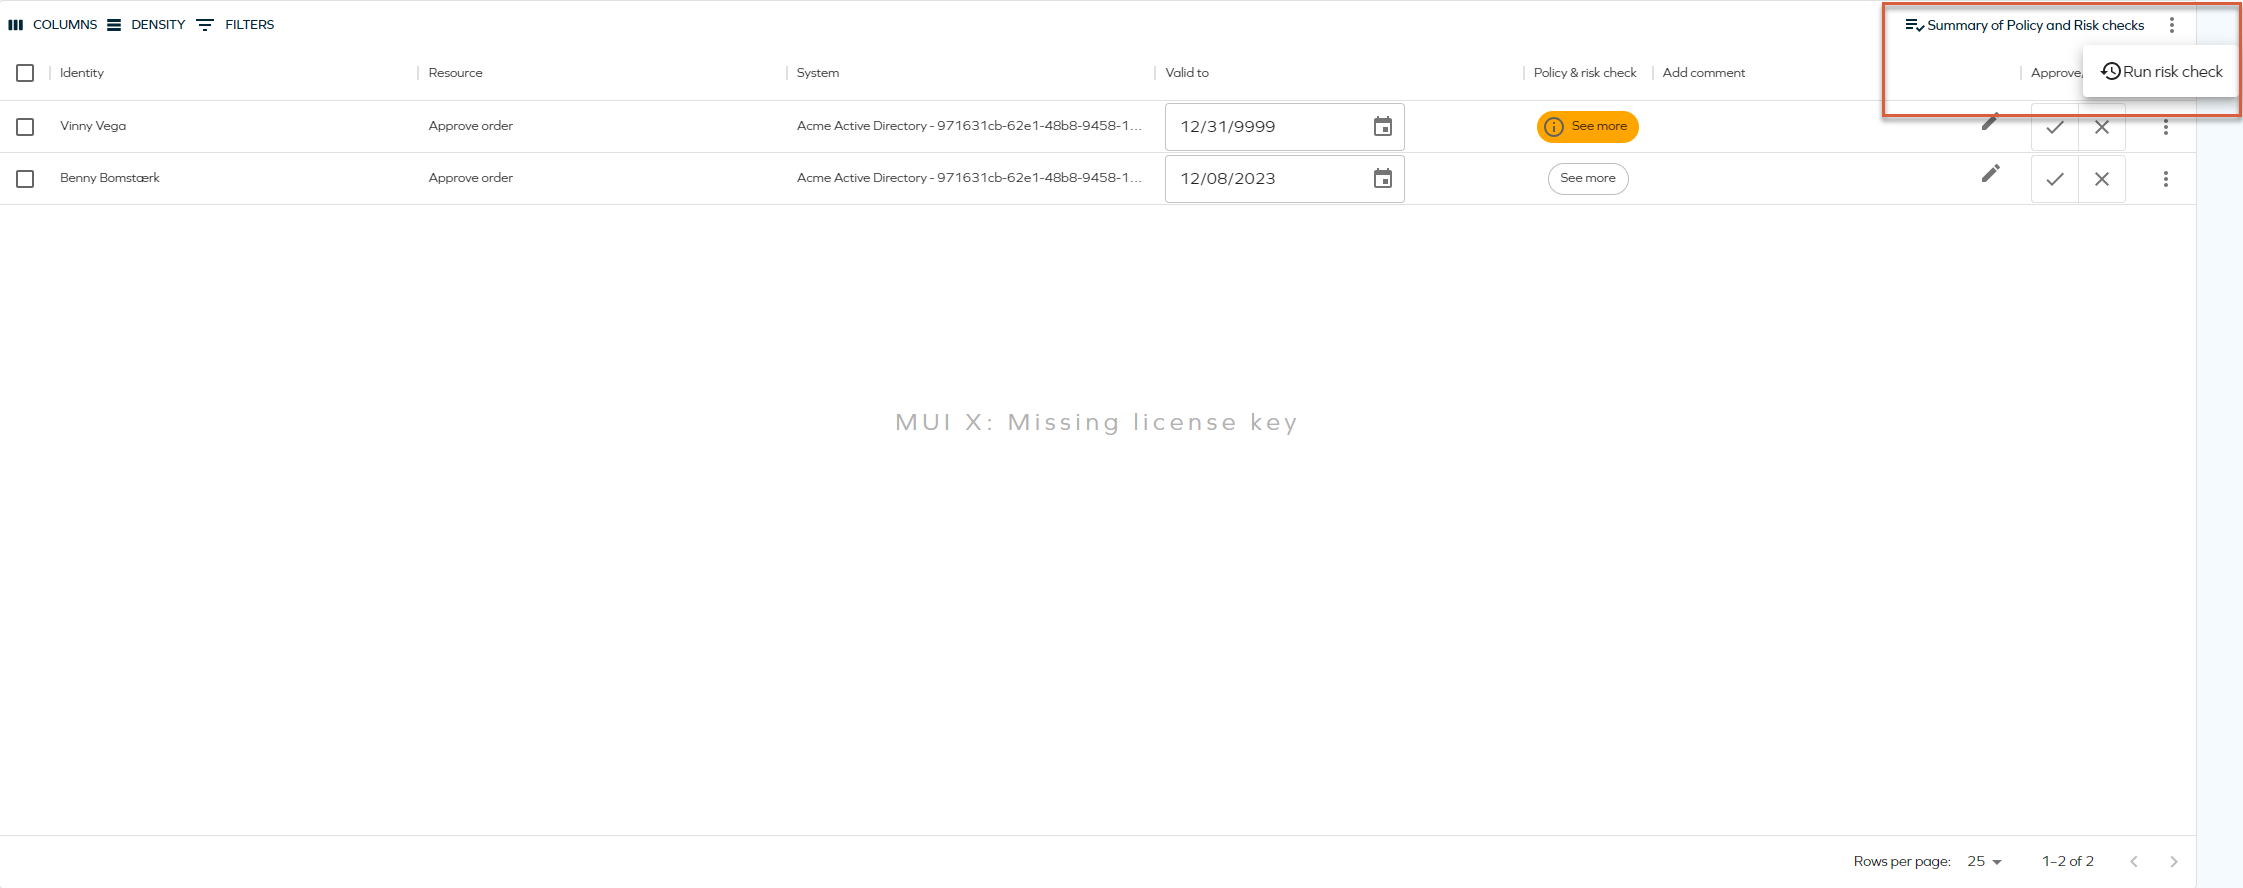
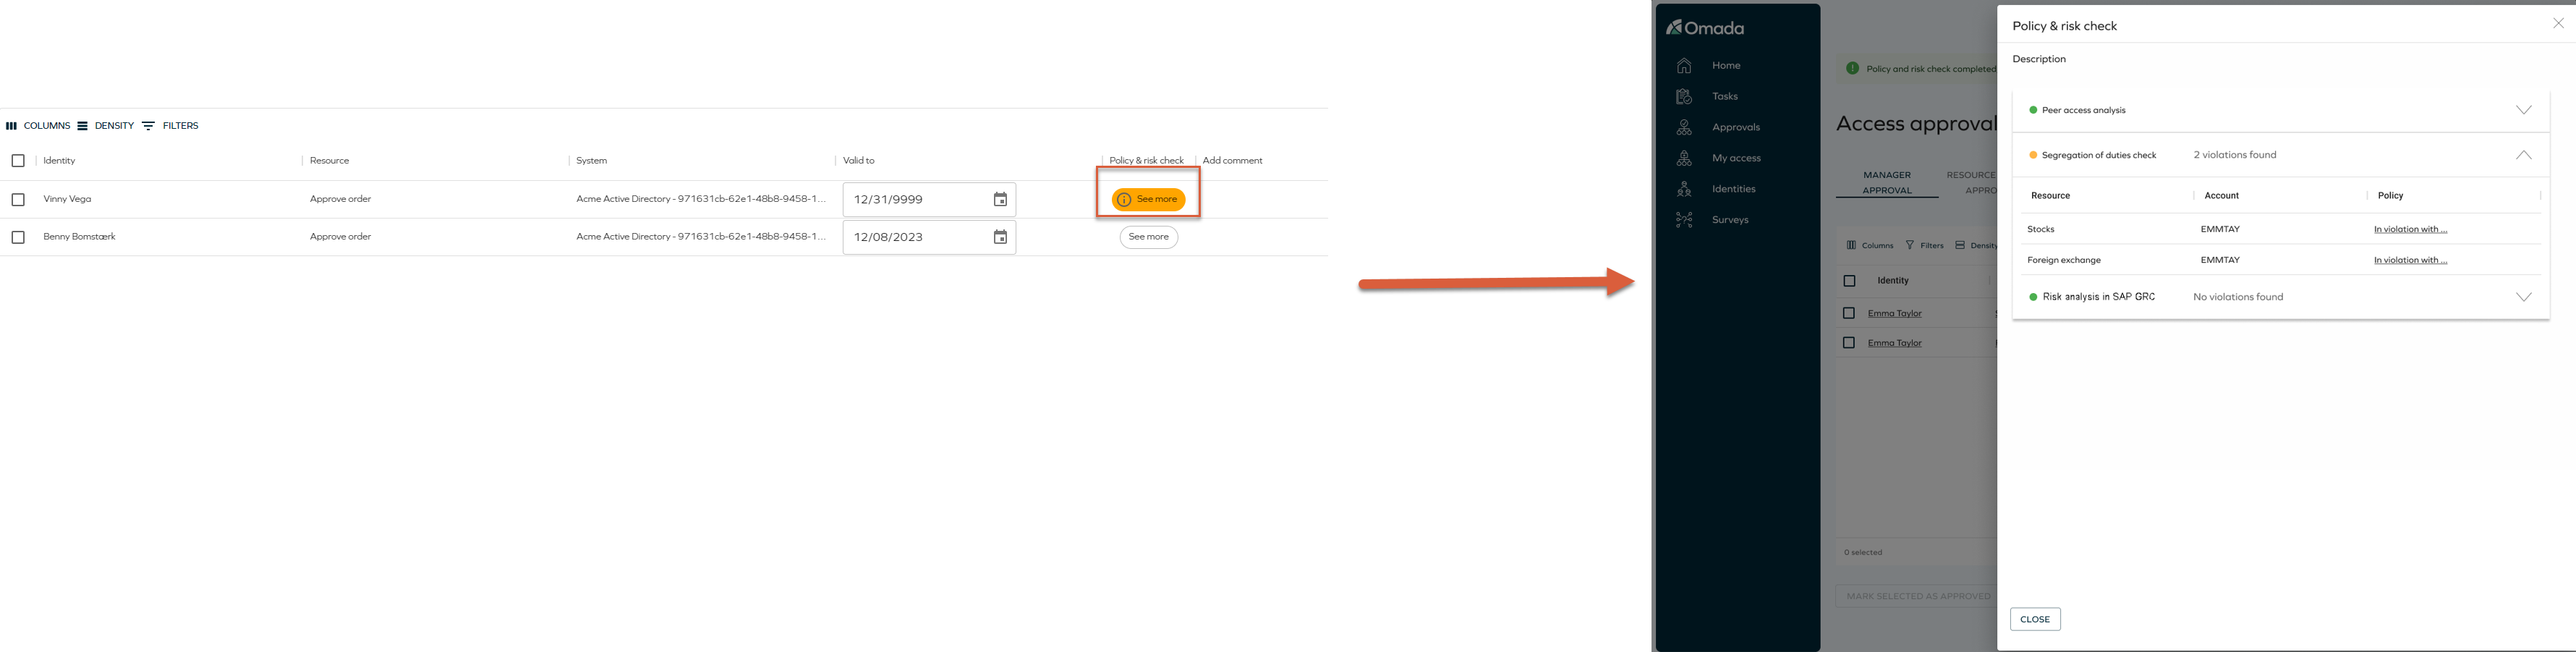
Policy & Risk Check
Policy and risk checks are automatically initiated when you access the Access Approval page. Additionally, you have the option to manually trigger the policy and risk checks by clicking on the Run risk check button.
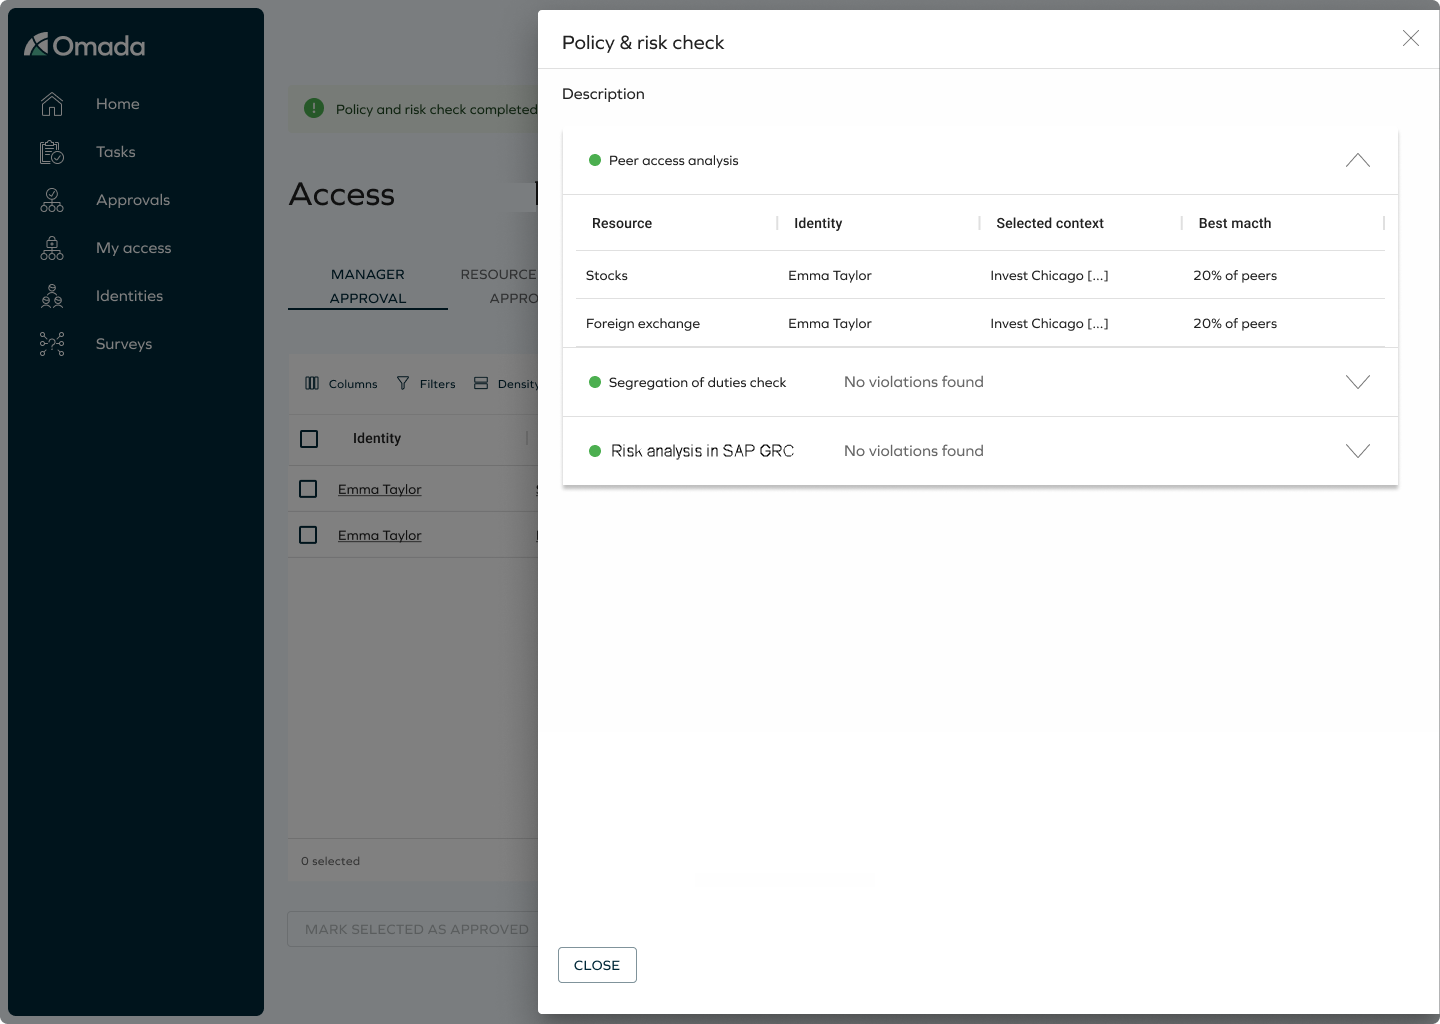
Once the check is completed and no violations are found then a confirmation message will display. You can view a detailed summary by clicking on the See More button within the Policy & Risk Check column. This will provide access to the summary, allowing you to review the results of the Peer Access Analysis check, Segregation of Duties check, and General Risk check.
In the case that violations are detected, a warning message will pop up, indicating the presence of issues that require yout attention. To inspect the violations, click on the See More button, which will open the Risk checks violations summary.
Custom email templates
Follow these steps to modify custom email templates to link to the Access Approval flow:
-
Enable Use new UI for approvals customer setting: Go to Setup > Customer settings. Search for Use new UI for approvals and enable it by setting its value to TRUE.
-
Locate the email template: Find the templates under Setup > Email templates.
-
Identify the link to the activity: in each template, find the part of the template that generates the link to the activity.
-
Replace the activity link with the Approval UI link: replace the link for the activity, with the link to
/approveaccess/(Perform Manager approval tab is active by default), or to/approveaccess/(ActivityName) to active the corresponding tab for the activity. In this case (ActivityName) is the placeholder for the activity.- /approveaccess/ManagerApproval: Perform Manager Approval tab is active.
- /approveaccess/ResourceOwnerApproval: Perform Resource Owner Approval tab is active.
- /approveaccess/SystemOwnerApproval: Perform System Owner Approval tab is active.